Whether you’re looking to spice up your deck with a new deck stain or need a refresher on how to stain because it’s been a while since you last did a touch up, Deck&FencePro has you covered. We’re here to tell you all you need to know about deck staining and proper application to revamp your space.
Everything You Need To
Know About Deck Staining
How to Stain Your Deck
With summer just around the corner, we know that having a freshly stained deck is important for enjoying your time out back. Staining a deck sounds like a big job but by following our easy guide below, you’ll learn the best way to apply deck stain in no time.
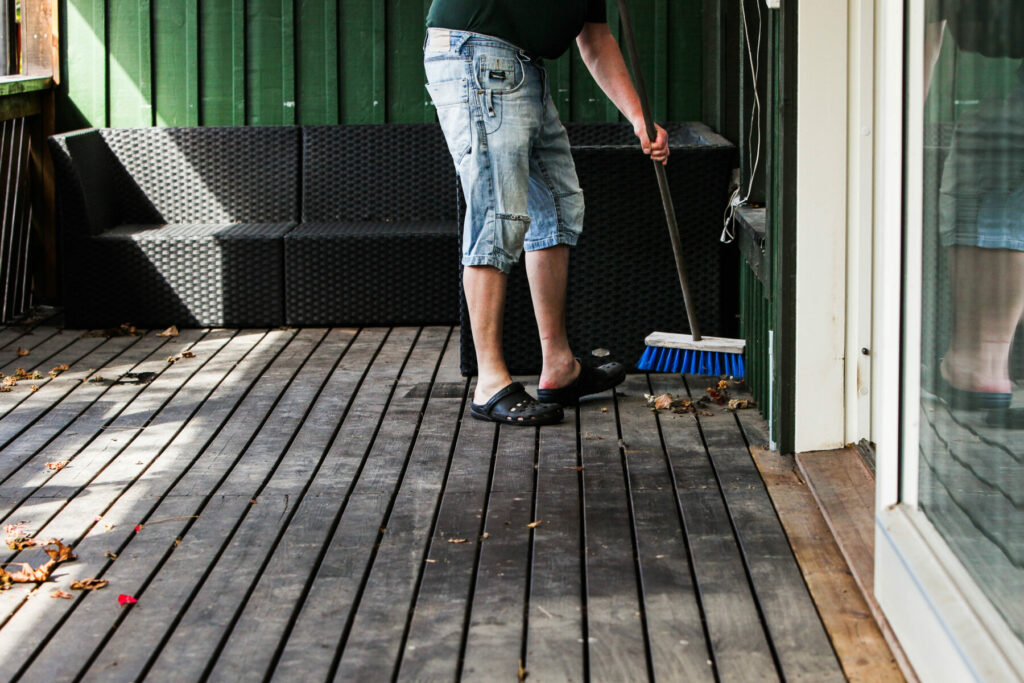
Step 1: Remove Debris, Plants, and Outdoor Furniture
Prior to staining your deck, the deck should be cleared of the following to determine whether any repairs are needed:
- Furniture and plants – removing plants ensures that they are not harmed by any chemicals used when staining the deck.
- Debris – use a soft or hard bristle brush depending on what your deck needs.
Once you have removed furniture, plants and debris, you will be able to inspect the space for mould and other imperfections: such as warped or broken pieces of wood, and broken screws. A clear space will also allow you to flatten any nails that are not flush against the deck.
Step 2: Properly Clean the Deck
Cleaning your deck thoroughly and correctly is one of the most important steps when staining your deck. A well cleaned deck allows for the stain to soak in and properly cure.
Here’s how to clean your deck:
- Remove all loose debris, leaves and dirt using either a soft or stronger bristled broom depending on the level of cleaning required.
- Following the instructions on the deck cleaner and using a measuring cup, mix the correct amount of deck cleaner into a bucket of water.
- After dipping your deck scrub broom in the cleaning mixture, thoroughly scrub the whole deck. Leave the cleaning mixture for 10-20 minutes. Remember to wear closed shoes, gloves and a mask when scrubbing the deck.
- Rinse the cleaning mixture from the deck. Leave the deck to dry.
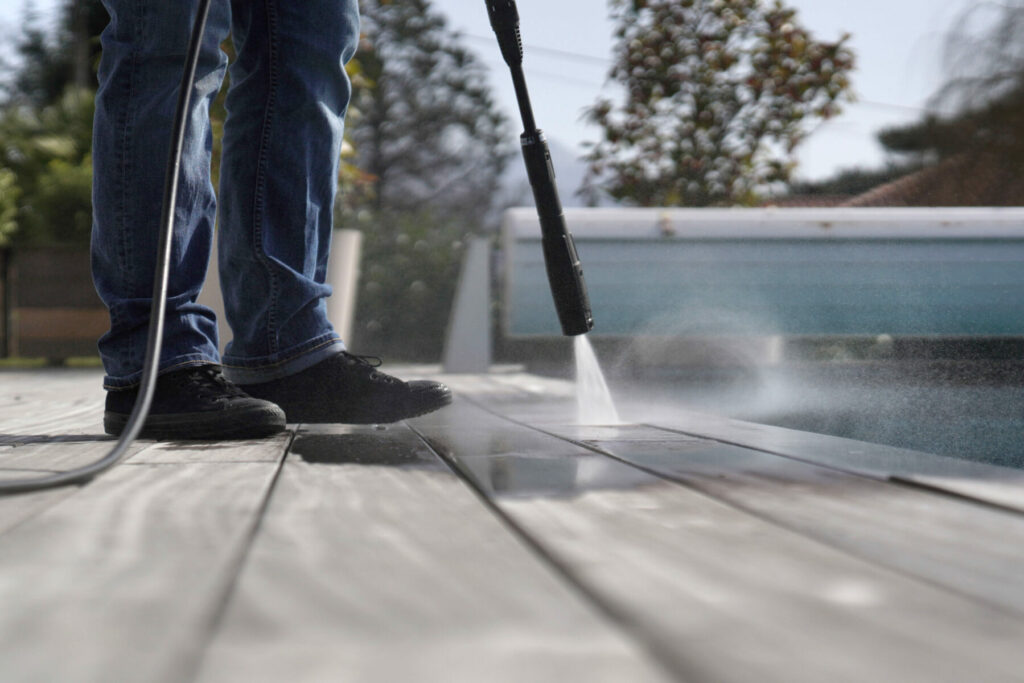
For decks with particularly stubborn stains, it’s best to call in the professionals: as harsher methods like pressure washers may cause damage if used incorrectly.
Step 3: Deck Staining Prep
Before you can finally begin the staining process, make sure you have checked the following tasks off your list:
- Take an offcut of your decking timber with you into the store to get a realistic idea of how a deck stain colour will look when applied.
- Use masking tape to cover any areas you do not want to stain. Remember to also cover areas (such as concrete and the edge of the deck where it meets your house) from which stain cannot be removed.
- Give the stain a thorough stir to ensure an even application.
Step 4: Stain Edges and Corners of the Deck
Let the fun part begin! Start by ‘cutting in’ the edges and corners of the deck with a brush. This avoids a sloppy application of the deck stain. Blend the stain as you go and remember to use long brush strokes.
Step 5: Stain the Rest of the Deck Surface
Using the correct applicator to stain the large portions of the deck is essential to making sure your deck looks polished when finished. Here’s a list of the applicators that you can use, as well as the pros and cons of each.
Deck Stain Mop
- Pros: easiest method, quick application, minimal stain wastage
- Cons: unable to stain hard-to-reach areas
Wood Stain Brushes
- Pros: allows stain to penetrate deep into the wood, not expensive, least amount of stain wastage
- Cons: slow application, paint brush bristles may shed and get caught in stain
Paint Rollers
- Pros: quick application, minimal stain wastage
- Cons: holds less stain in comparison to stain mops, unable to stain hard-to-reach areas
Deck Stain Sprayers
- Pros: quick application of stain, can stain the deck in hard-to-reach areas
- Cons: difficult to get an even application, overspray is common, expensive, wastes the most amount of stain
The best way to stain the remainder of your deck is by using long and even strokes, making sure to blend as you go and back brushing to help the deck stain absorb more evenly. Remember to not paint yourself into a corner and leave the deck stain to fully dry for 24-48 hours (depending on weather, deck and wood type).
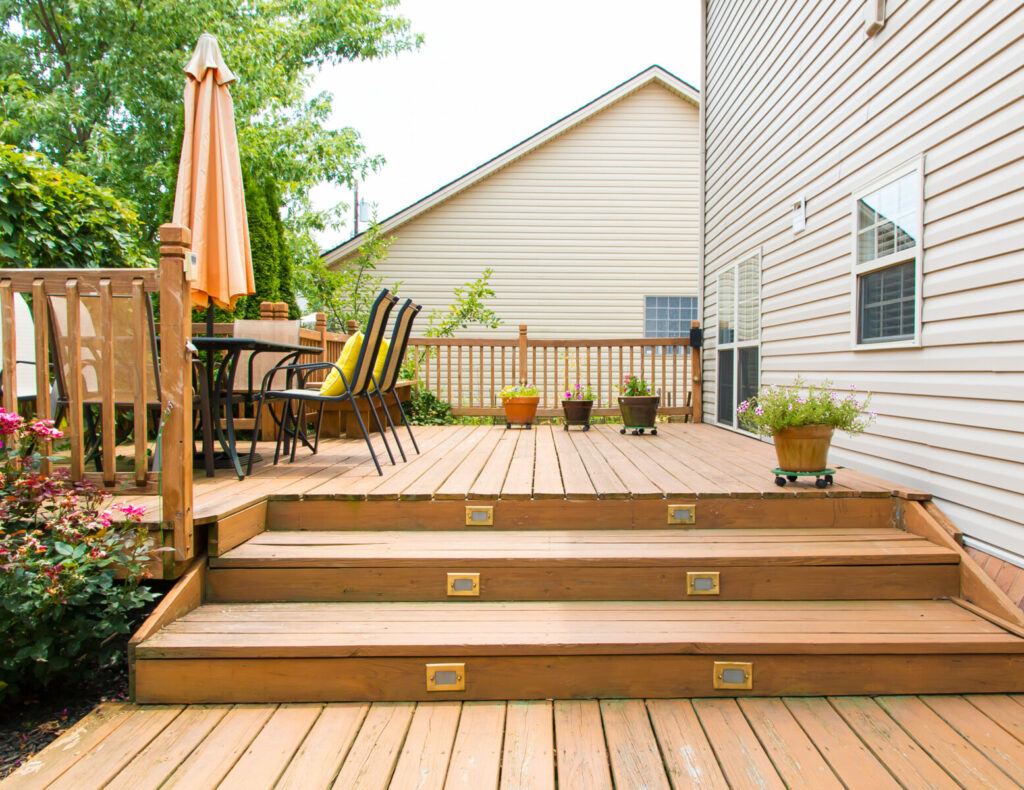
Step 6: Replace Deck Furniture and Plants
Congratulations! You have successfully stained your deck. Once the deck is fully dry, replace any items such as furniture, plants and appliances removed prior to staining. Remember to take care of your wood and perform routine annual deck maintenance—which can also be done with the help of professionals. This will guarantee you a long lasting and beautiful deck stain.

Best Tools for Deck Staining
While it’s important to know how to stain a deck, the correct use of tools is equally crucial. Quality tools ensure the durability of your deck staining job. The following recommendations are some of the best tools for deck staining:
- Synthetic deck stain brushes are ideal for water-based or hybrid stains.
- Lambswool applicator is a deck stain mop and allows for easy, even distribution of the stain onto your deck boards.
- A high end deck cleaning solution that effectively cleans your deck while also eliminating mould and other contaminants.
No Pressure Water? No Problem.
It’s okay if you don’t own a pressure washer! While a pressure washer is a good tool for preparing some deck types for staining, you can alternatively use a hose pipe attached to a tap. Using the concentrated jets from a hose pipe will clear away loose dirt on your deck.
See our other Deck&FencePro services?
Professional Deck Staining
with Deck&FencePro
Deck&FencePro understands that maintaining outside living spaces can be challenging and time consuming. At the same time, it is no secret that well maintained outdoor spaces add to the quality of your home, and so Deck&FencePro offers a range of services:
- Restoring and maintaining timber decks and fences
- Restoring and maintaining garden furniture
- Fence and deck cleaning, repair and rebuilding
- Restoring cedar garage doors
Call us on 0508 422 532 or visit our website today to book yourself a quote. It’s never too late to start looking after your outdoor timber.
Get inspired
Fence Painting or Staining New Zealand – Deck&Fence Pro
Your fence plays a crucial role in enhancing your property's curb appeal and providing privacy and security.
Get Your Outdoor Rooms & Living Areas Ready For Summer
An outdoor room is an extra living space — especially in the warmer months. In this article, Deck&FencePro tells you how to maintain an outdoor room year round.
Easy tips for deck cleaning and maintenance
There’s no such thing as a maintenance free deck, and even more so if your deck is timber.
View our work
A magical backyard makeover – Auckland
When Alex moved to her new home in Massey, she knew she’d need to do something about the sad and neglected backyard.
Timber deck rejuvenated in time for summer in Canterbury
We prefer a stained look because it handles the strong UV sun better and seems to weather more evenly.
Weathered pine deck makeover- North Shore
Radiata pine decking is one of New Zealand’s most commonly used and well-loved decking materials.
FAQ
Can you apply oil stain to a deck that has been previously painted (or stained with waterbased stain)?
In order to answer this it is important to understand the differences between paint, waterbased stain, and oil stain. Paint and waterbased stains are effectively the same thing - topical coatings that seal the surface of the timber. Waterbased stains are just thinned down acrylic paint that allow the grain of the timber to show through but they block up the pores of the timber the same as paint. Oil stain is a penetrating product that needs to soak into the surface of the timber to provide nourishment.
It is not possible to apply oil stain over paint (or water based stain) unless all of the exiting coating is fully removed. This is because the oil will not be able to penetrate through the coating. The only way to remove the paint or waterbased stain is to use paint stripper (or mechanical sanding if the deck allows that). Both of these processes are time consuming and expensive, and may not remove all of the existing coating.
The result of this is that the new oil stain may be patchy, and may not last as long as on bare timber. Our recommendation is usually to recoat the deck with the same product that was previously applied. In the case of water based stain, this can also result in a patchy finish as the fully stripped timber will soak up more product than those areas that still have some residual product on it.
We can only do our best in this situation. The only other option is to replace the deck boards with new.
Should I stain or paint my new deck?
We strongly recommend avoiding painting your deck. Decks are subjected to very harsh conditions, from intense sun in the summer, to long period of standing water in the winter. And they are constantly being abraded by foot traffic, furniture being dragged across the surface, etc. There are no paints that will withstand this treatment, and painted decks deteriorate very quickly.
Another consideration is that once painted, you cannot change to stain down the track. There is no practical way to remove the paint well enough to allow an oil stain to penetrate the timber. When we come across painted decks for restoration, our only option is to clean and repaint, and advise the homeowner that this process will need to be repeated quite regularly.
You must however protect your deck from the elements, and the best product for that is a good quality linseed oil based stain that has UV protection in it. If you do not do this the timber will turn grey within 6 months, and mould will start to take hold.
Can I stain or paint my new deck straight away?
New outdoor timber generally has a high moisture content, so it is recommend not to coat it with stain or paint for a few months to allow it to dry out. If it is coated too early the product may not penetrate or bond very well. Typically we say leave it 3-6 months.
Why has my cedar garage door gone black?
Cedar is a very soft and porous timber and is susceptible to mould and mildew. We usually see the lower half of the door turn darker in colour due to exposure to the elements. Our restoration process strips away the damaged layer so that the timber is even over the entire door, and our linseed oil stain protects the timber from future damage. An annual recoat of stain will keep the door as new for ever.
Are your specialists qualified?
Great question.
Most of the services The ProGroup offer require no formal qualifications, but every franchisee goes through full training in the services they provide. Ongoing experience and a fantastic support network within the group mean that each of our team are true specialists at what they do.
Some of our team also offer services outside of the core ProGroup range, and some of them do require certification or specialist qualifications. In that situation they will have the relevant recognised quals. For example we have LBP builders, plumbers, stonemasons, and gasfitters within the team.
What are your payment terms?
These vary depending on the service.
Typically lower value work requires full payment on completion. Product heavy work may require a deposit at time of quote acceptance, while longer term projects may require an initial deposit and progress payments along the way.
The terms of your particular situation will be discussed at time of the quote so there will be no hidden surprises.
Who will come and do the work?
Our specialists are all independently owned franchisees who live in your local community. Most are sole operators, who will quote the job and do the work themselves, while others may have an employee or two to help with the workload. Either way, everyone is well trained in the services they offer.
You can expect prompt, courteous, knowledgeable trades people to help with your enquiries. And all live and work within your local area.
What timber should I build my new deck with?
This really come down to your budget.
Pine is by far the cheapest and most common option and is treated against rotting. It can be stained to look like kwila or another shade of your choice.
Hardwoods such as Kwila, Garapa, and Vitex are not treated and will deteriorate quickly if they are not protected by some sort of preservative.
All timbers will turn grey within about 6 month if they are not regularly treated with a UV resistance product.
Composite decking has become more prevalent which uses compressed timber fibres and synthetic resins. These are usually made in specific colours and should not fade or deteriorate for many years - making them as close to maintenance free as possible.
Do you offer finance terms for your services?
Yes - we offer a “Buy Now, Pay Later” option through our partners at Latitude Financial (Gem Visa). We offer interest free payment terms of 6 or 12 months (some fees, terms and conditions apply).
Should I use oil or water-based deck stains?
Water based deck stain is effectively very thin acrylic paint, so thin you can see though it. The problem with it is that it clogs up the pores of the timber making it extremely difficult to maintain because the old residue is virtually impossible to remove. We use superior quality oil based wood stain that nourishes the timber and can be recoated time and time again.
Why does my Kwila deck have splinters?
Hardwoods such as Kwila come from tropical climates that have a lot of moisture in the air that makes the timber less likely to dry out and splinter. New Zealand’s harsh climate and intense sun quickly dries out the timber causing it to splinter, and Kwila is the most susceptible to this.
We recommend maintaining new Kwila decks by an annual application of linseed oil stain that will nourish the timber and stop it drying out.
There is very little that can be done to fix Kwila that has already dried out and splintered, short of replacing the boards. Because of this, Kwila is becoming less popular as a decking timber with other hardwoods such as Vitex and Garapa becoming more popular.
Do you use a waterblaster to pre-clean the timber?
We use a specialist eco-friendly solution to loosen dirt, contaminants, and dead timber cells followed by a controlled pressure wash to sluice this residue away. Our team are very skilled at this process.
Over the years we have seen many DIY deck cleans, where the homeowner has used a waterblaster on its own without any specialist cleaning solution, and with poor technique. The result can vary from stop/start marks in the timber that cannot be removed, to chunks of timber being blasted away.
There are products available that claim you simply apply them and then brush the deck clean. We know that there is a lot of elbow grease required, and many of our customers come to use having given up on these products. Like most things in life, there is no easy way to get a professional result.
How do I maintain my restored deck, fence, door, or furniture?
A wood stain generally requires a top up coat every 12-18 months to replenish the nourishing oils and UV blockers. We can arrange an on-going maintenance schedule with you following the restoration process that will include a light clean followed by a recoat of the wood stain. In between scheduled maintenance, a mild detergent is all that is needed to remove any bird droppings or spills, and a spray with a moss and lichen inhibitor during winter can also help. It is important to not use harsh deck cleaning agents that may remove the oils contained in the stain. Painted surfaces generally last longer than stained ones but are more susceptible to abrasion.
Book a quote now
For any enquiries regarding your outdoor living spaces, or to request a quote, please enter your details and your local Deck&FencePro franchisee will be in touch to arrange an appointment as soon as possible.
If you prefer not to give a full address at this stage feel free to book a quote by phone at the free phone number below.
0508 422 532
Note that The ProGroup has strict operational processes in place with regards to Covid 19 and the relevant alert levels.